The Halo body scan experience accurately measures body fat using a smartphone camera and ML to analyze a series of four photos in the cloud. As the lead designer, I was tasked with designing an experience that educates the customer on how to take a scan as well as guides them through the process during a scan.
One of the many challenges was structuring the flow of information so customers understood the scan requirements without being overwhelmed. To address these issues, I created motion studies to test scan pacing, animation, sound cues, and voice over guideance. The motion studies were instrumental in determining when and where to provide the right information and guidance.
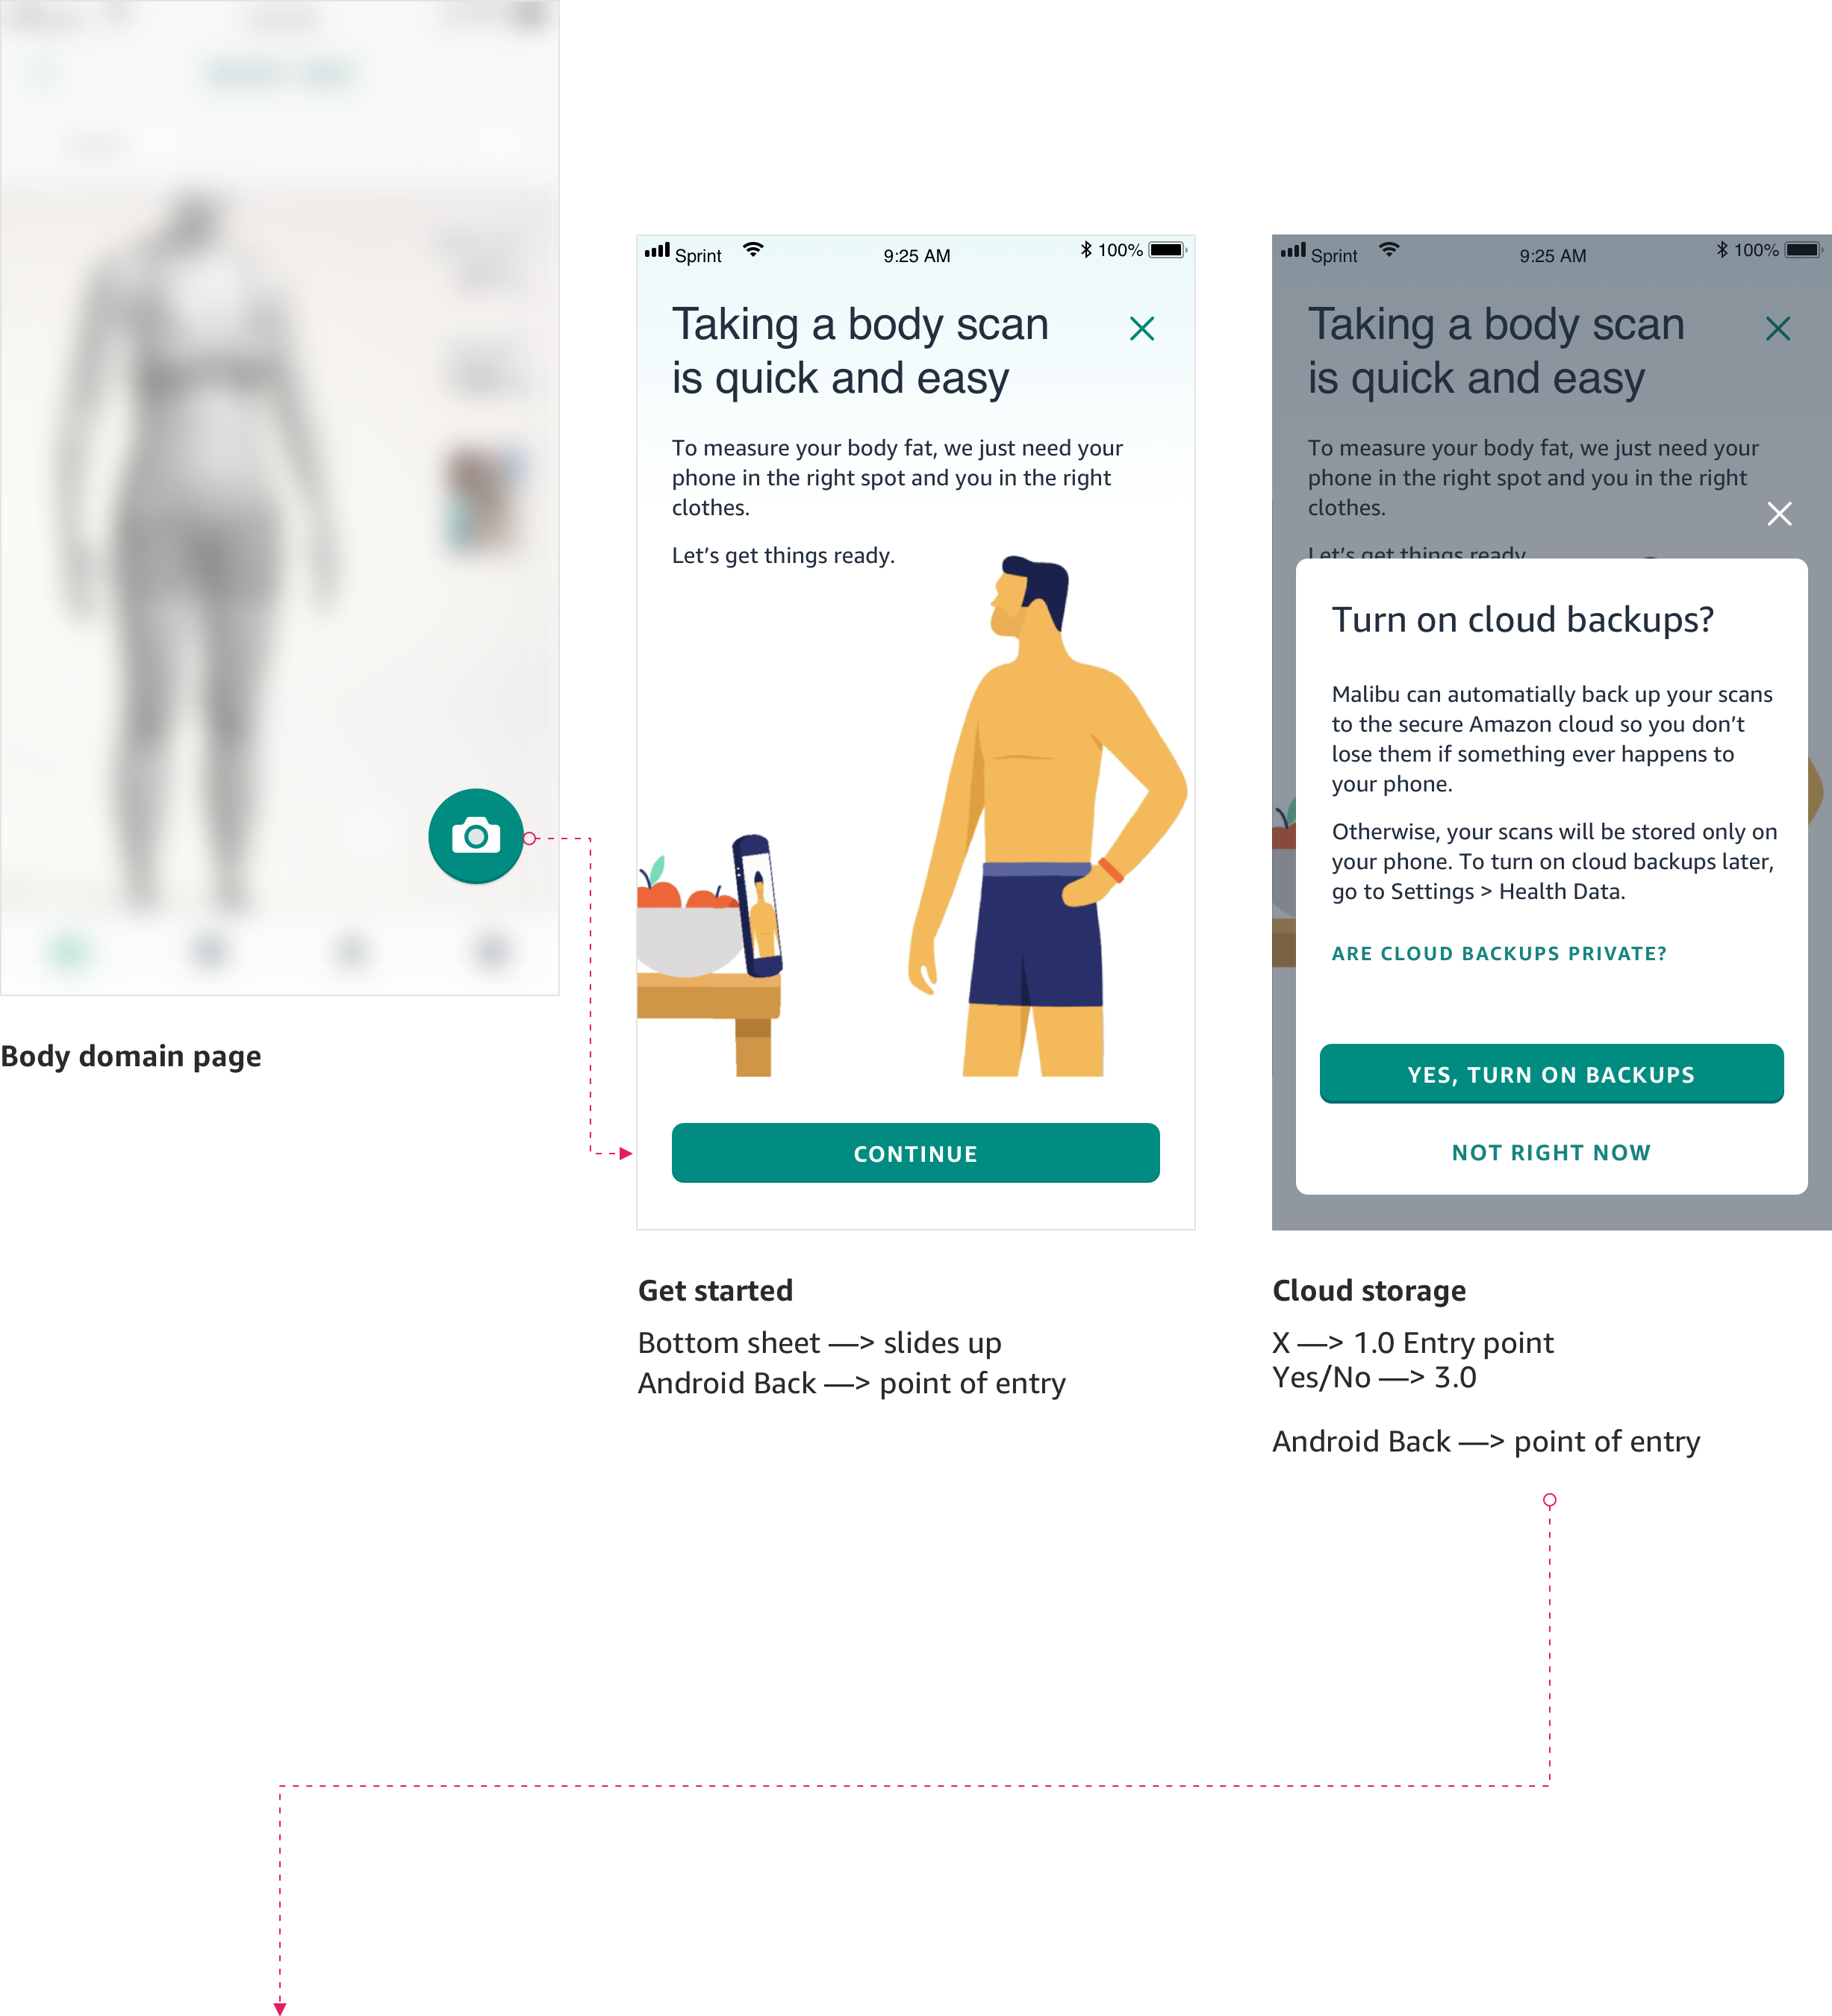
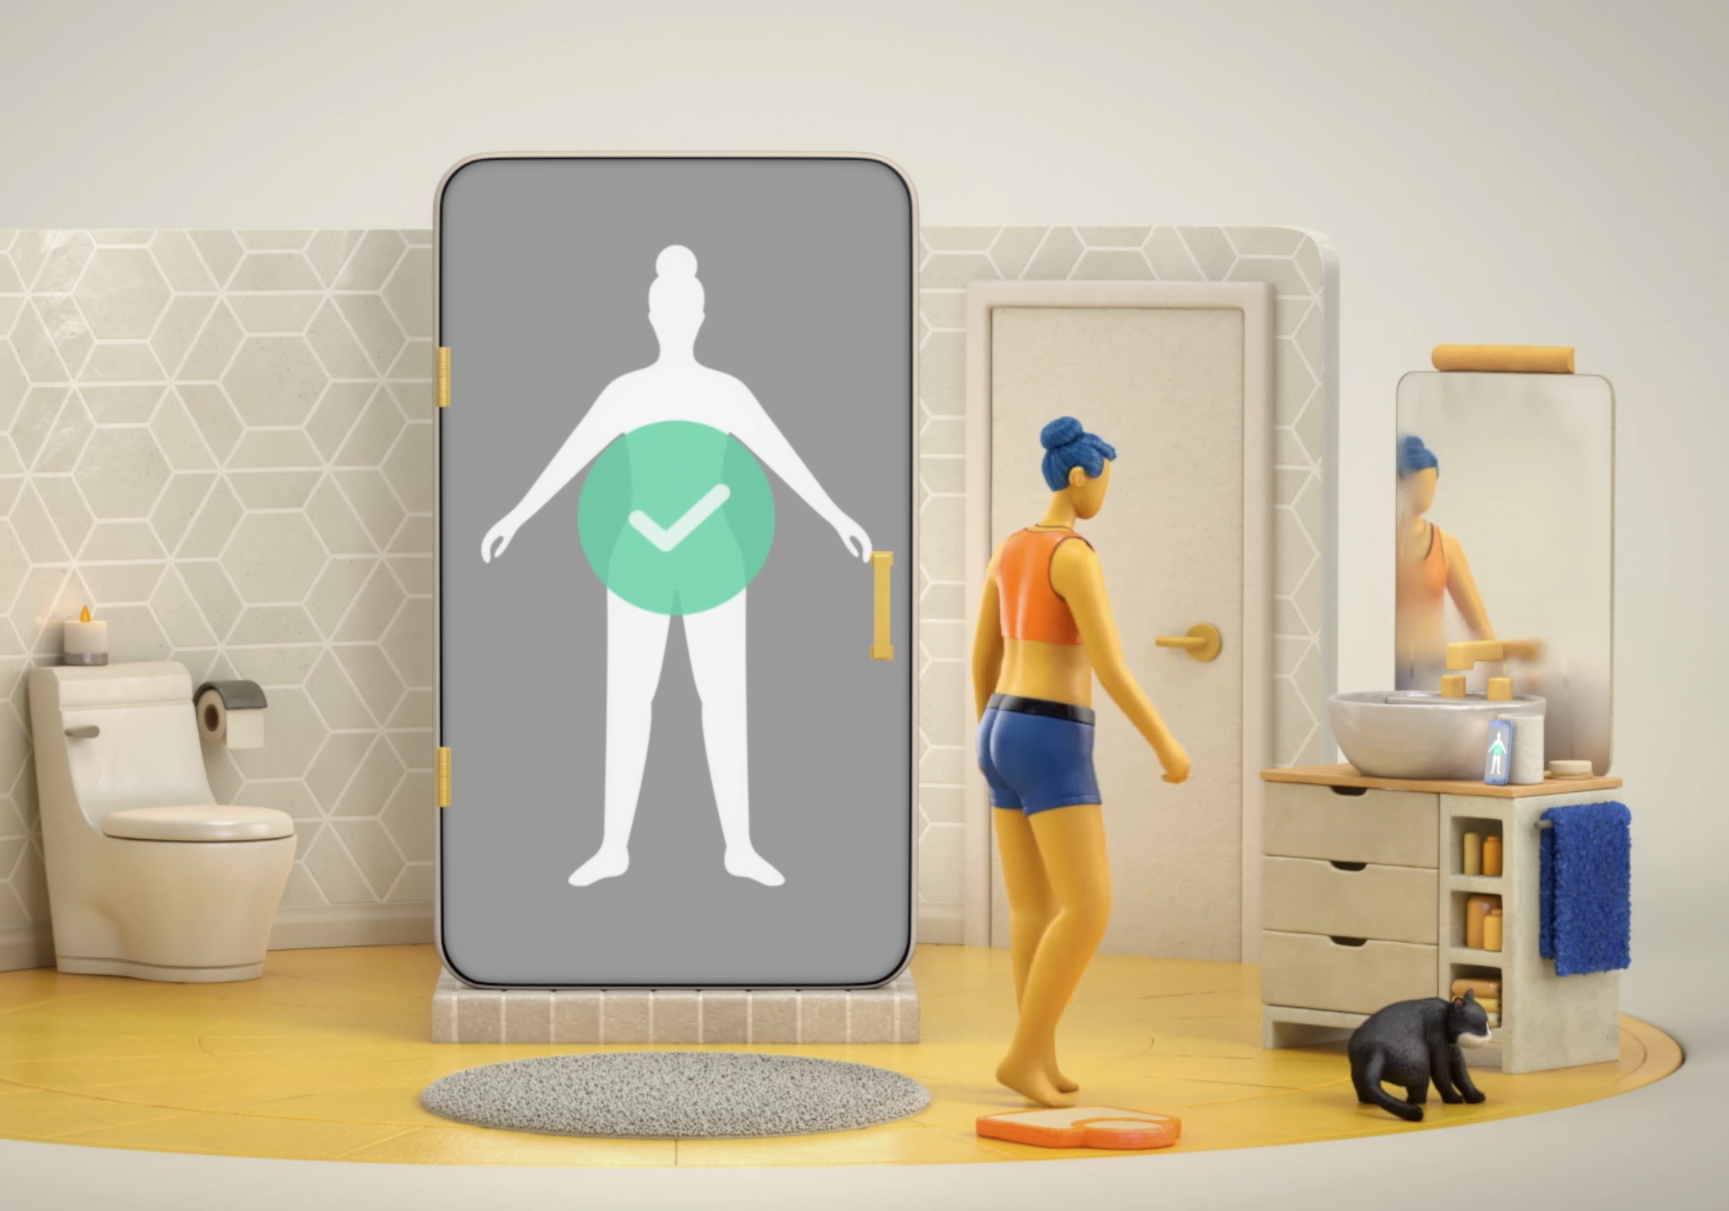
Customers launch the body scan experience from the Body domain page. The start screen lets the customer know what to expect. Once they select continue, they’re asked if they want to turn on cloud storage for scan data.
Privacy was a big concern throughout the experience and anywhere we asked for personal data we tried to address privacy.
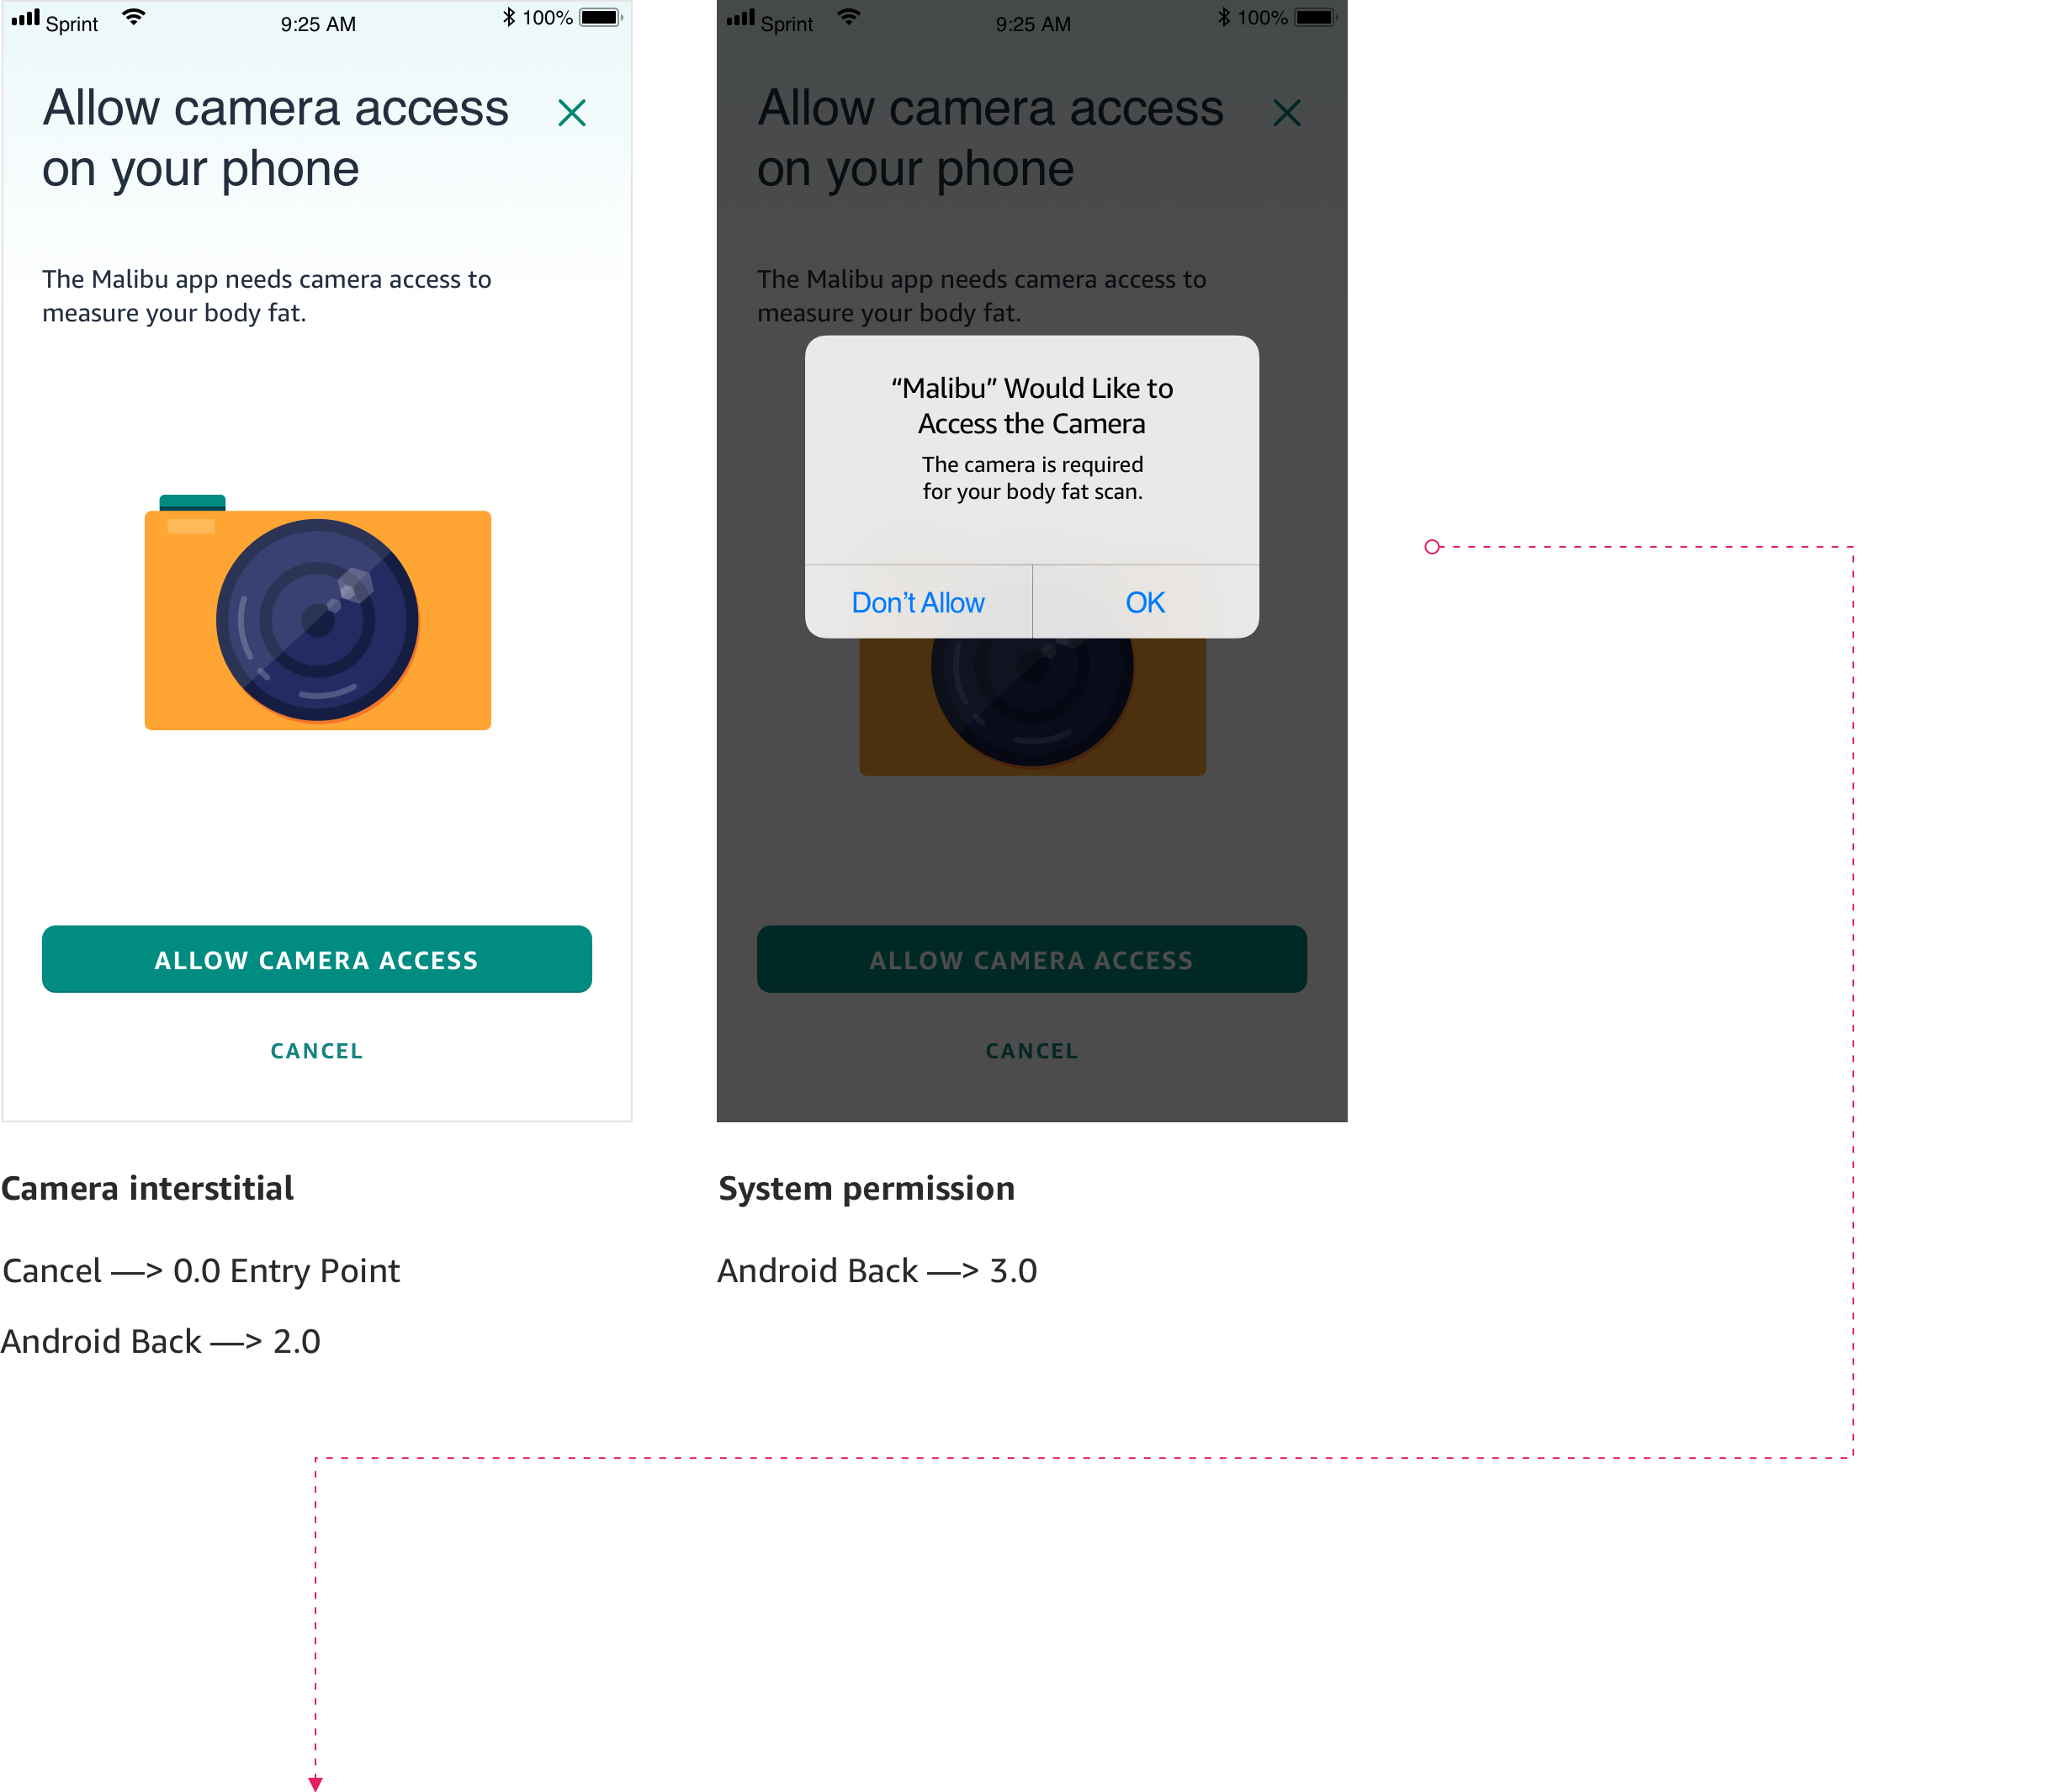
Next, we ask the customer for permission to use their camera. The first permission screen is an interstitial letting customers know why we need permission to use the camera. If for some reason the customer doesn't want to grant access, the interstitial screen captures the rejection before the system and allows us to ask again in the future.
The interstitial screen was a recommendation I made based on my previous experience with mobile permissions and opt-out. The idea is to be transparent and tell the customer up front why we need permission and what they’ll be missing out on if they decline.
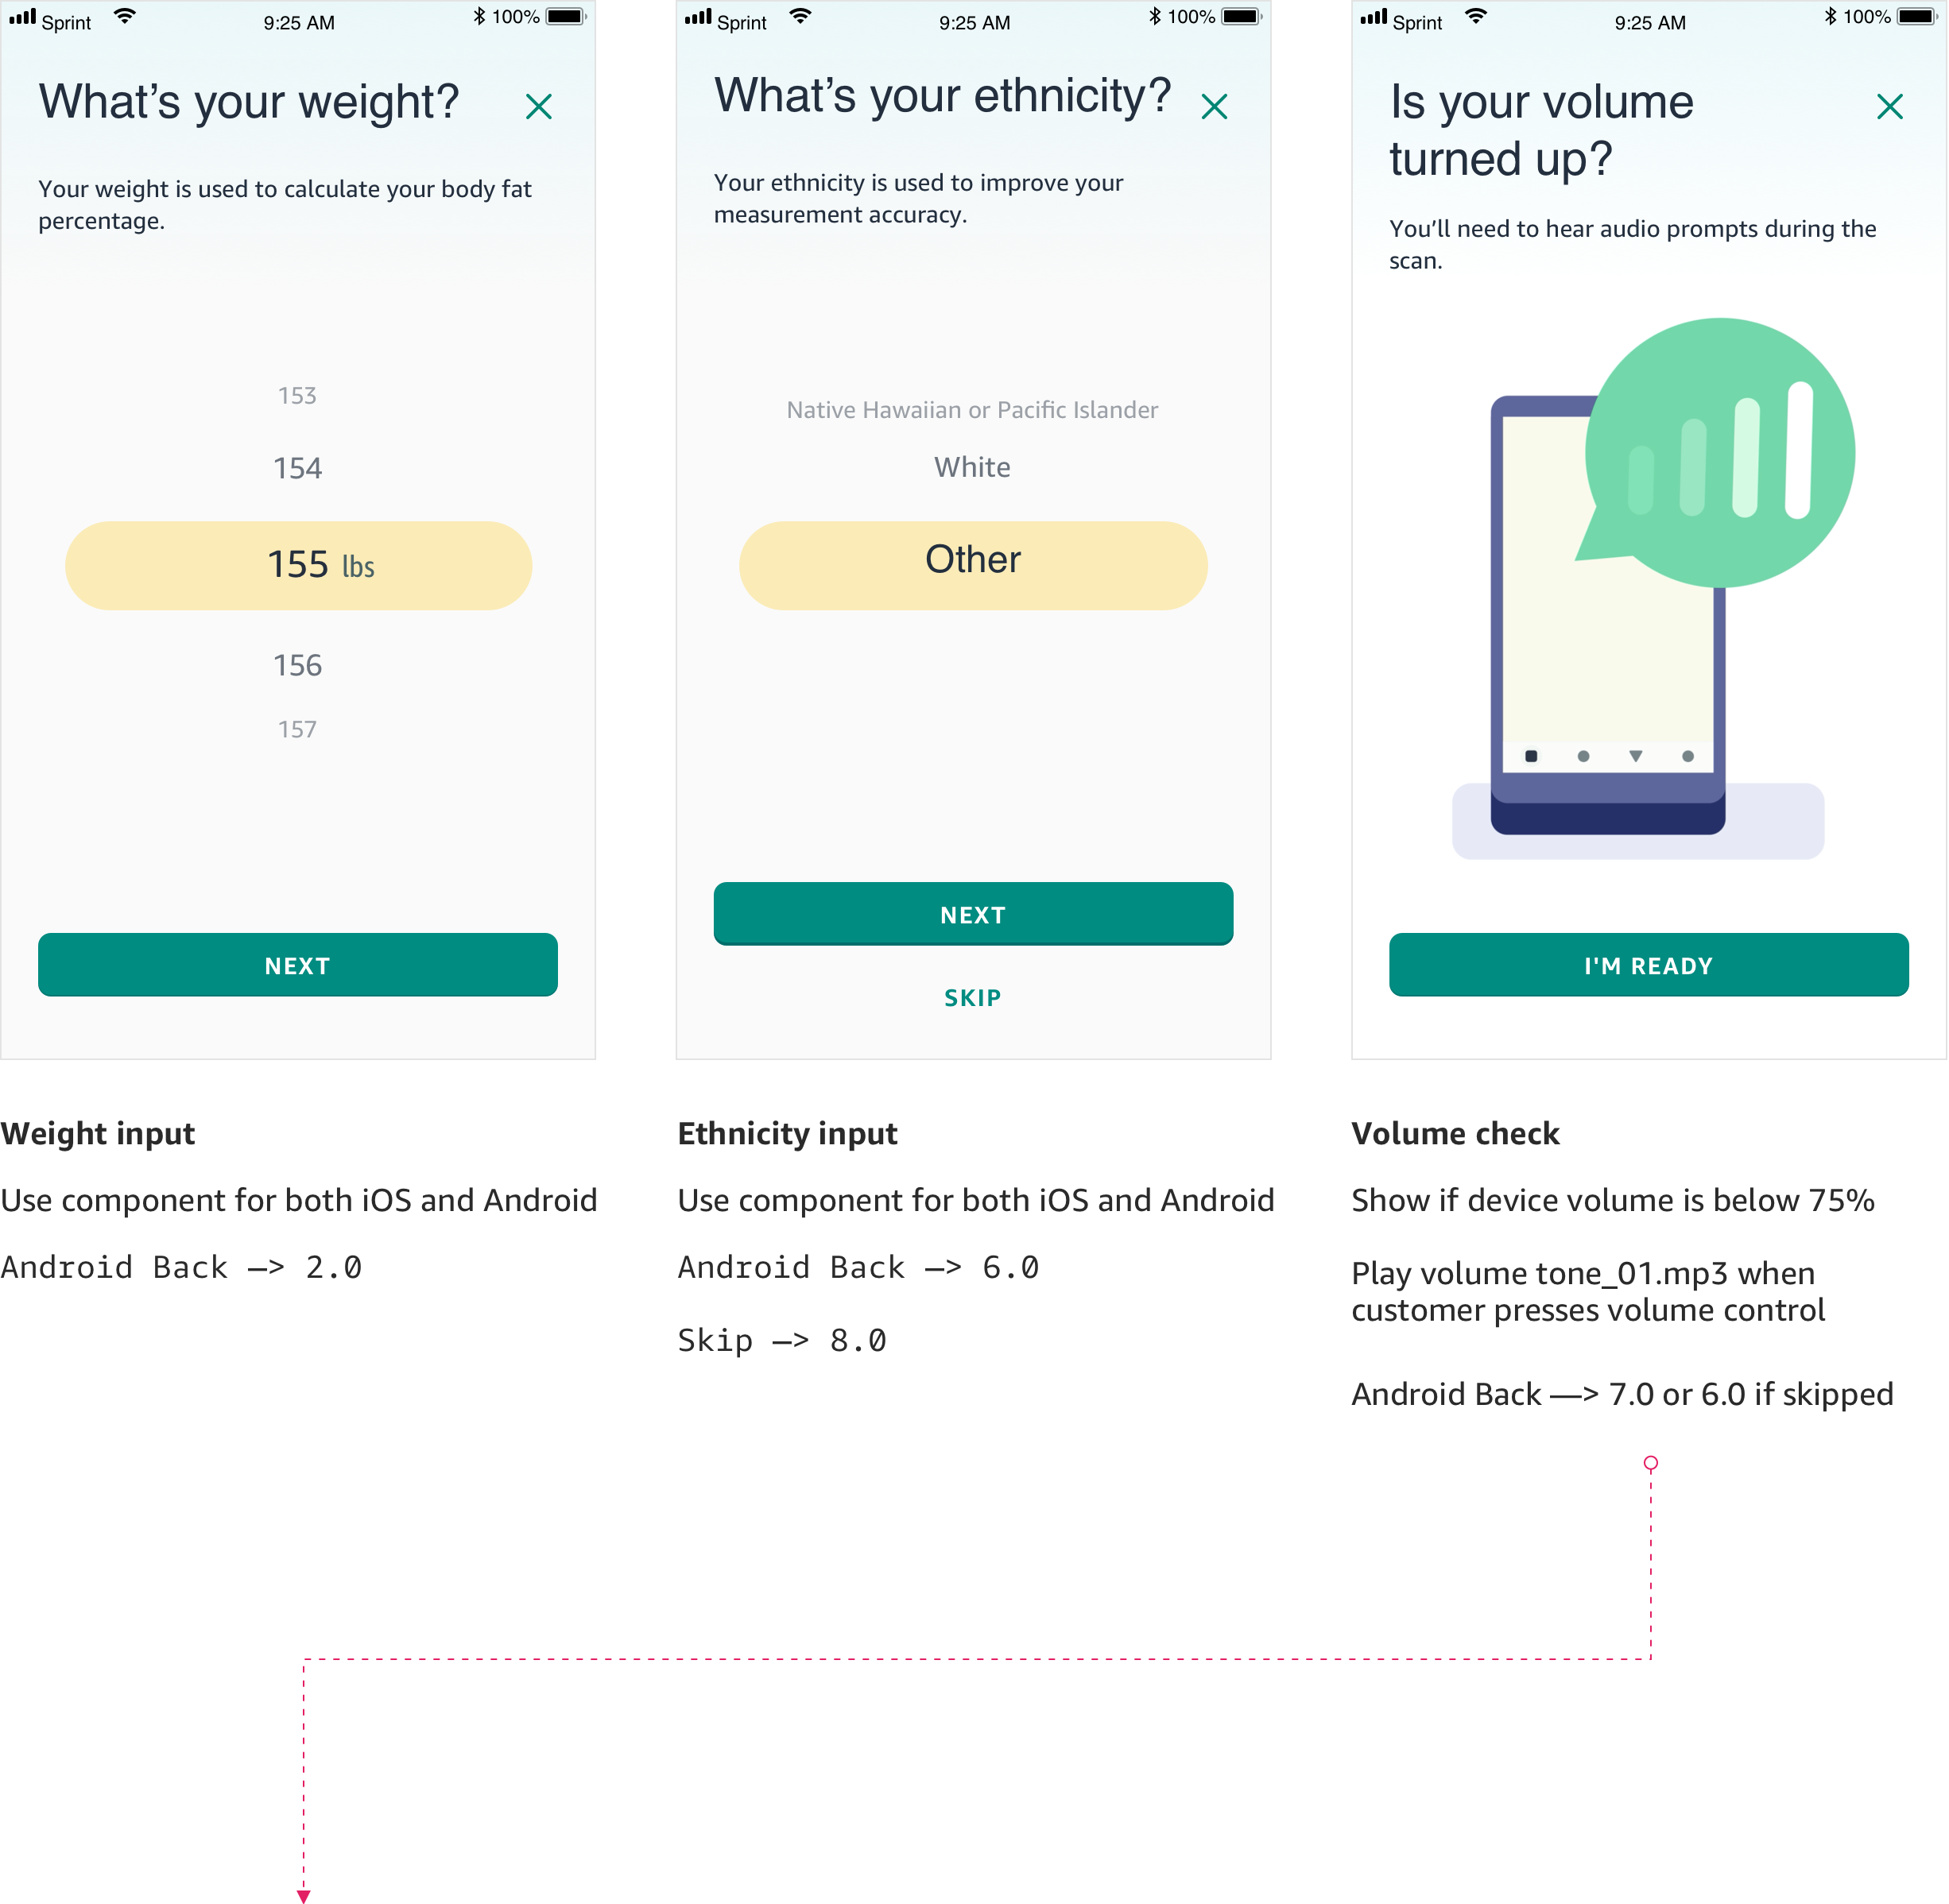
Weight and ethnicity are required for body fat calculations. Customers only have to enter their ethnicity once, but their weight every 30 days as recommended by health and fitness officials.
Once the customer enters their ethnicity, we perform a quick volume check to determine if it’s loud enough for them to hear the guidance.
The scan setup guide is a series of animated vignettes that guide the customer through the best practices for taking a scan.
We learned from failed scan data that lighting, clothing, hair, device placement, and environment setup were the most important areas to address. I used that information to write a script and created a set of 5 animations to guide customers through the setup process.
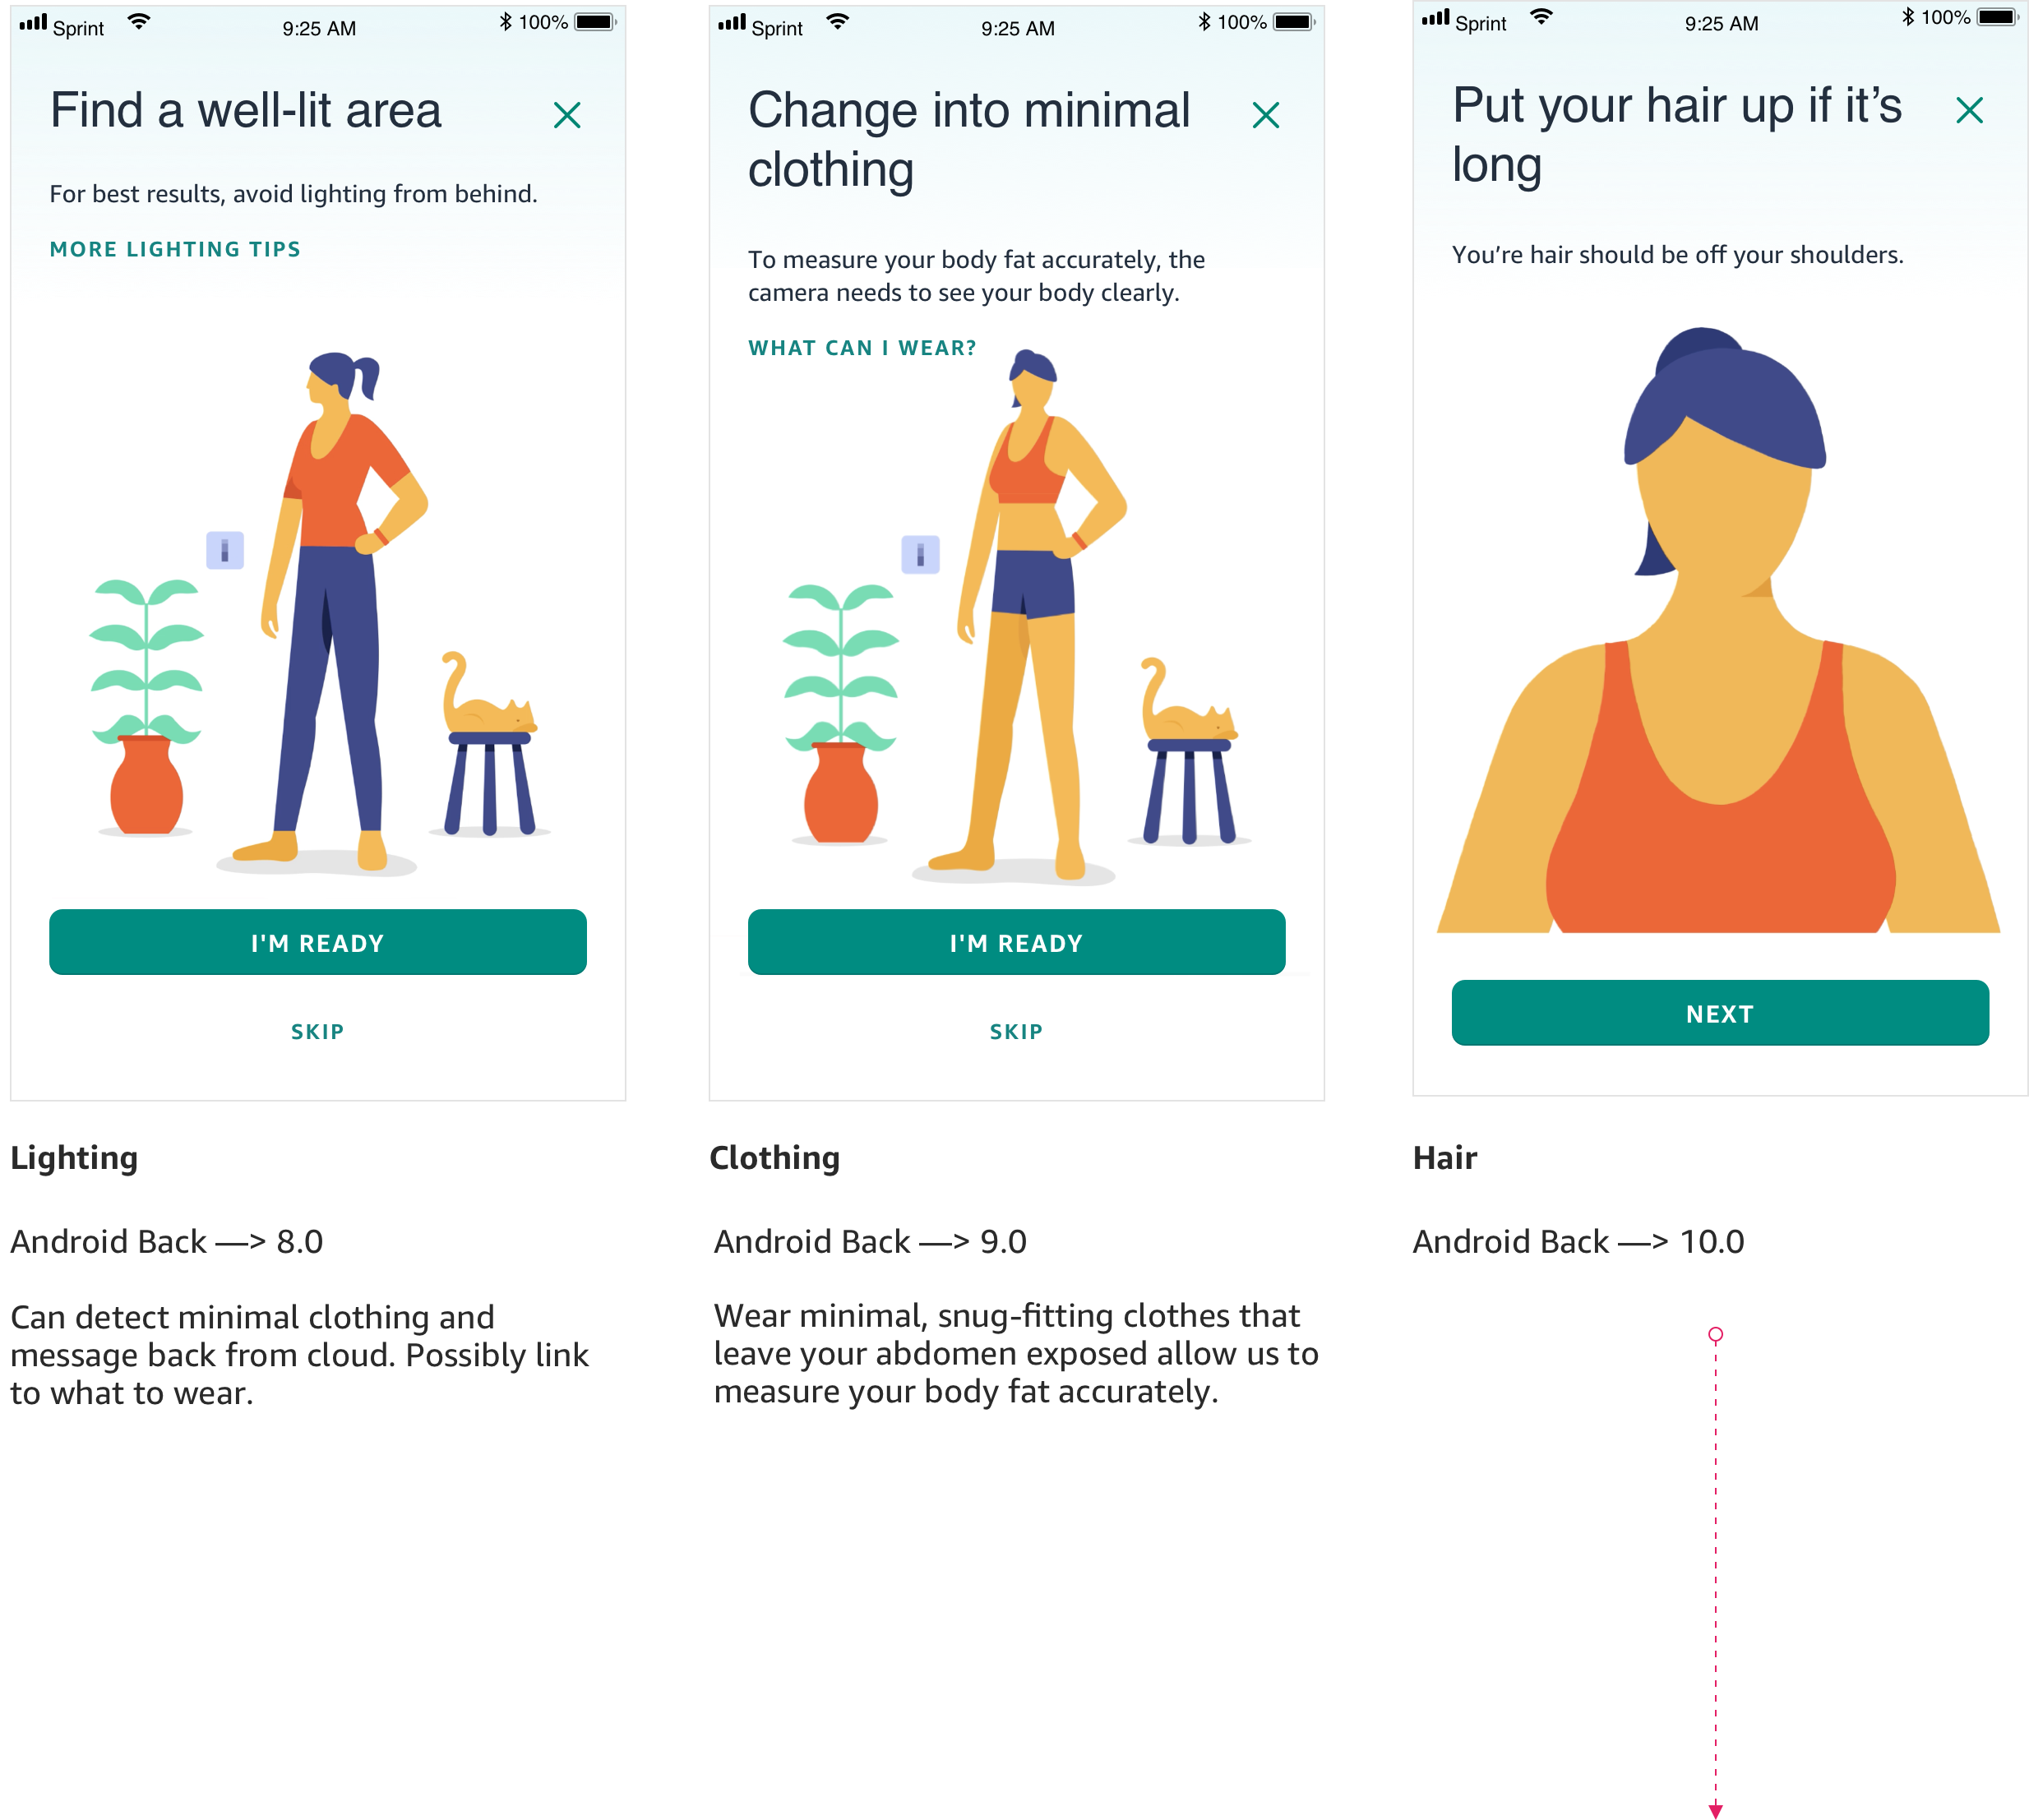
One of the biggest challenges was trying to communicate abstract concepts like lighting and phone positioning. Since everyone’s environment is different, we had to balance between being too specific and too general.
For example, we ask customers to find a “surface” that is knee to waist high. I put a lot of thought in the generality of the word “surface” since not everyone has a table, desk, dresser, etc. in their home.
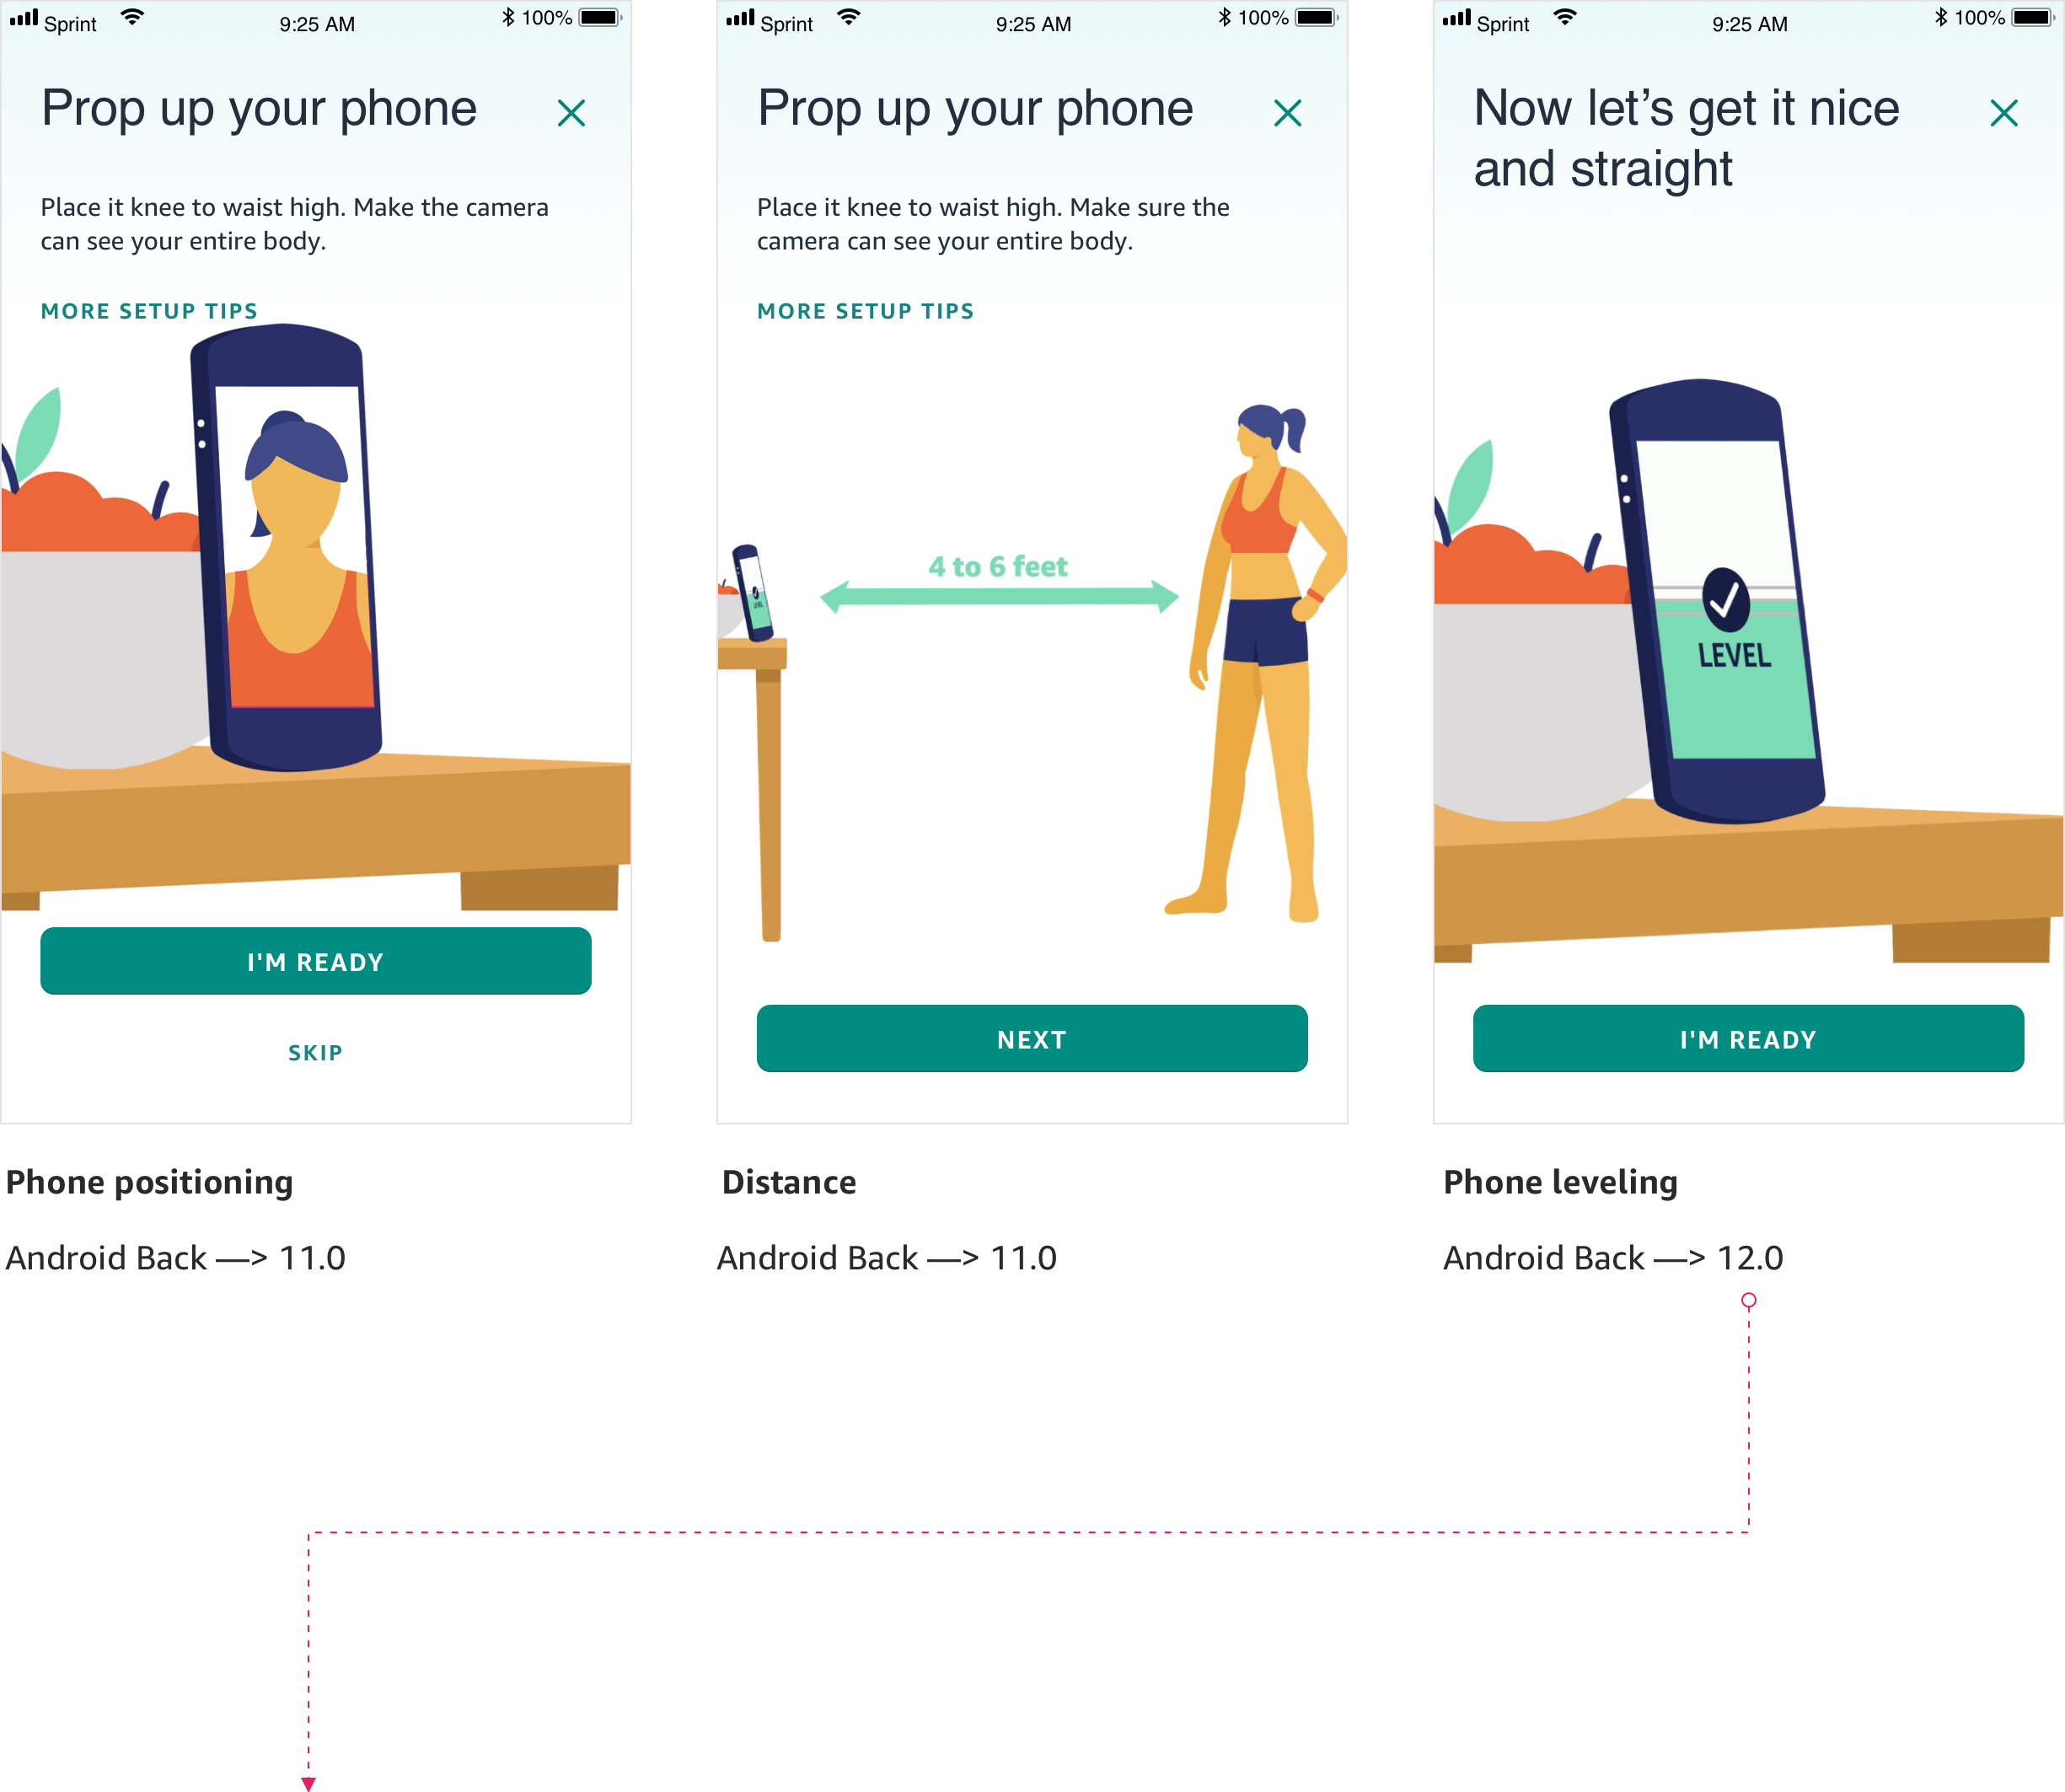
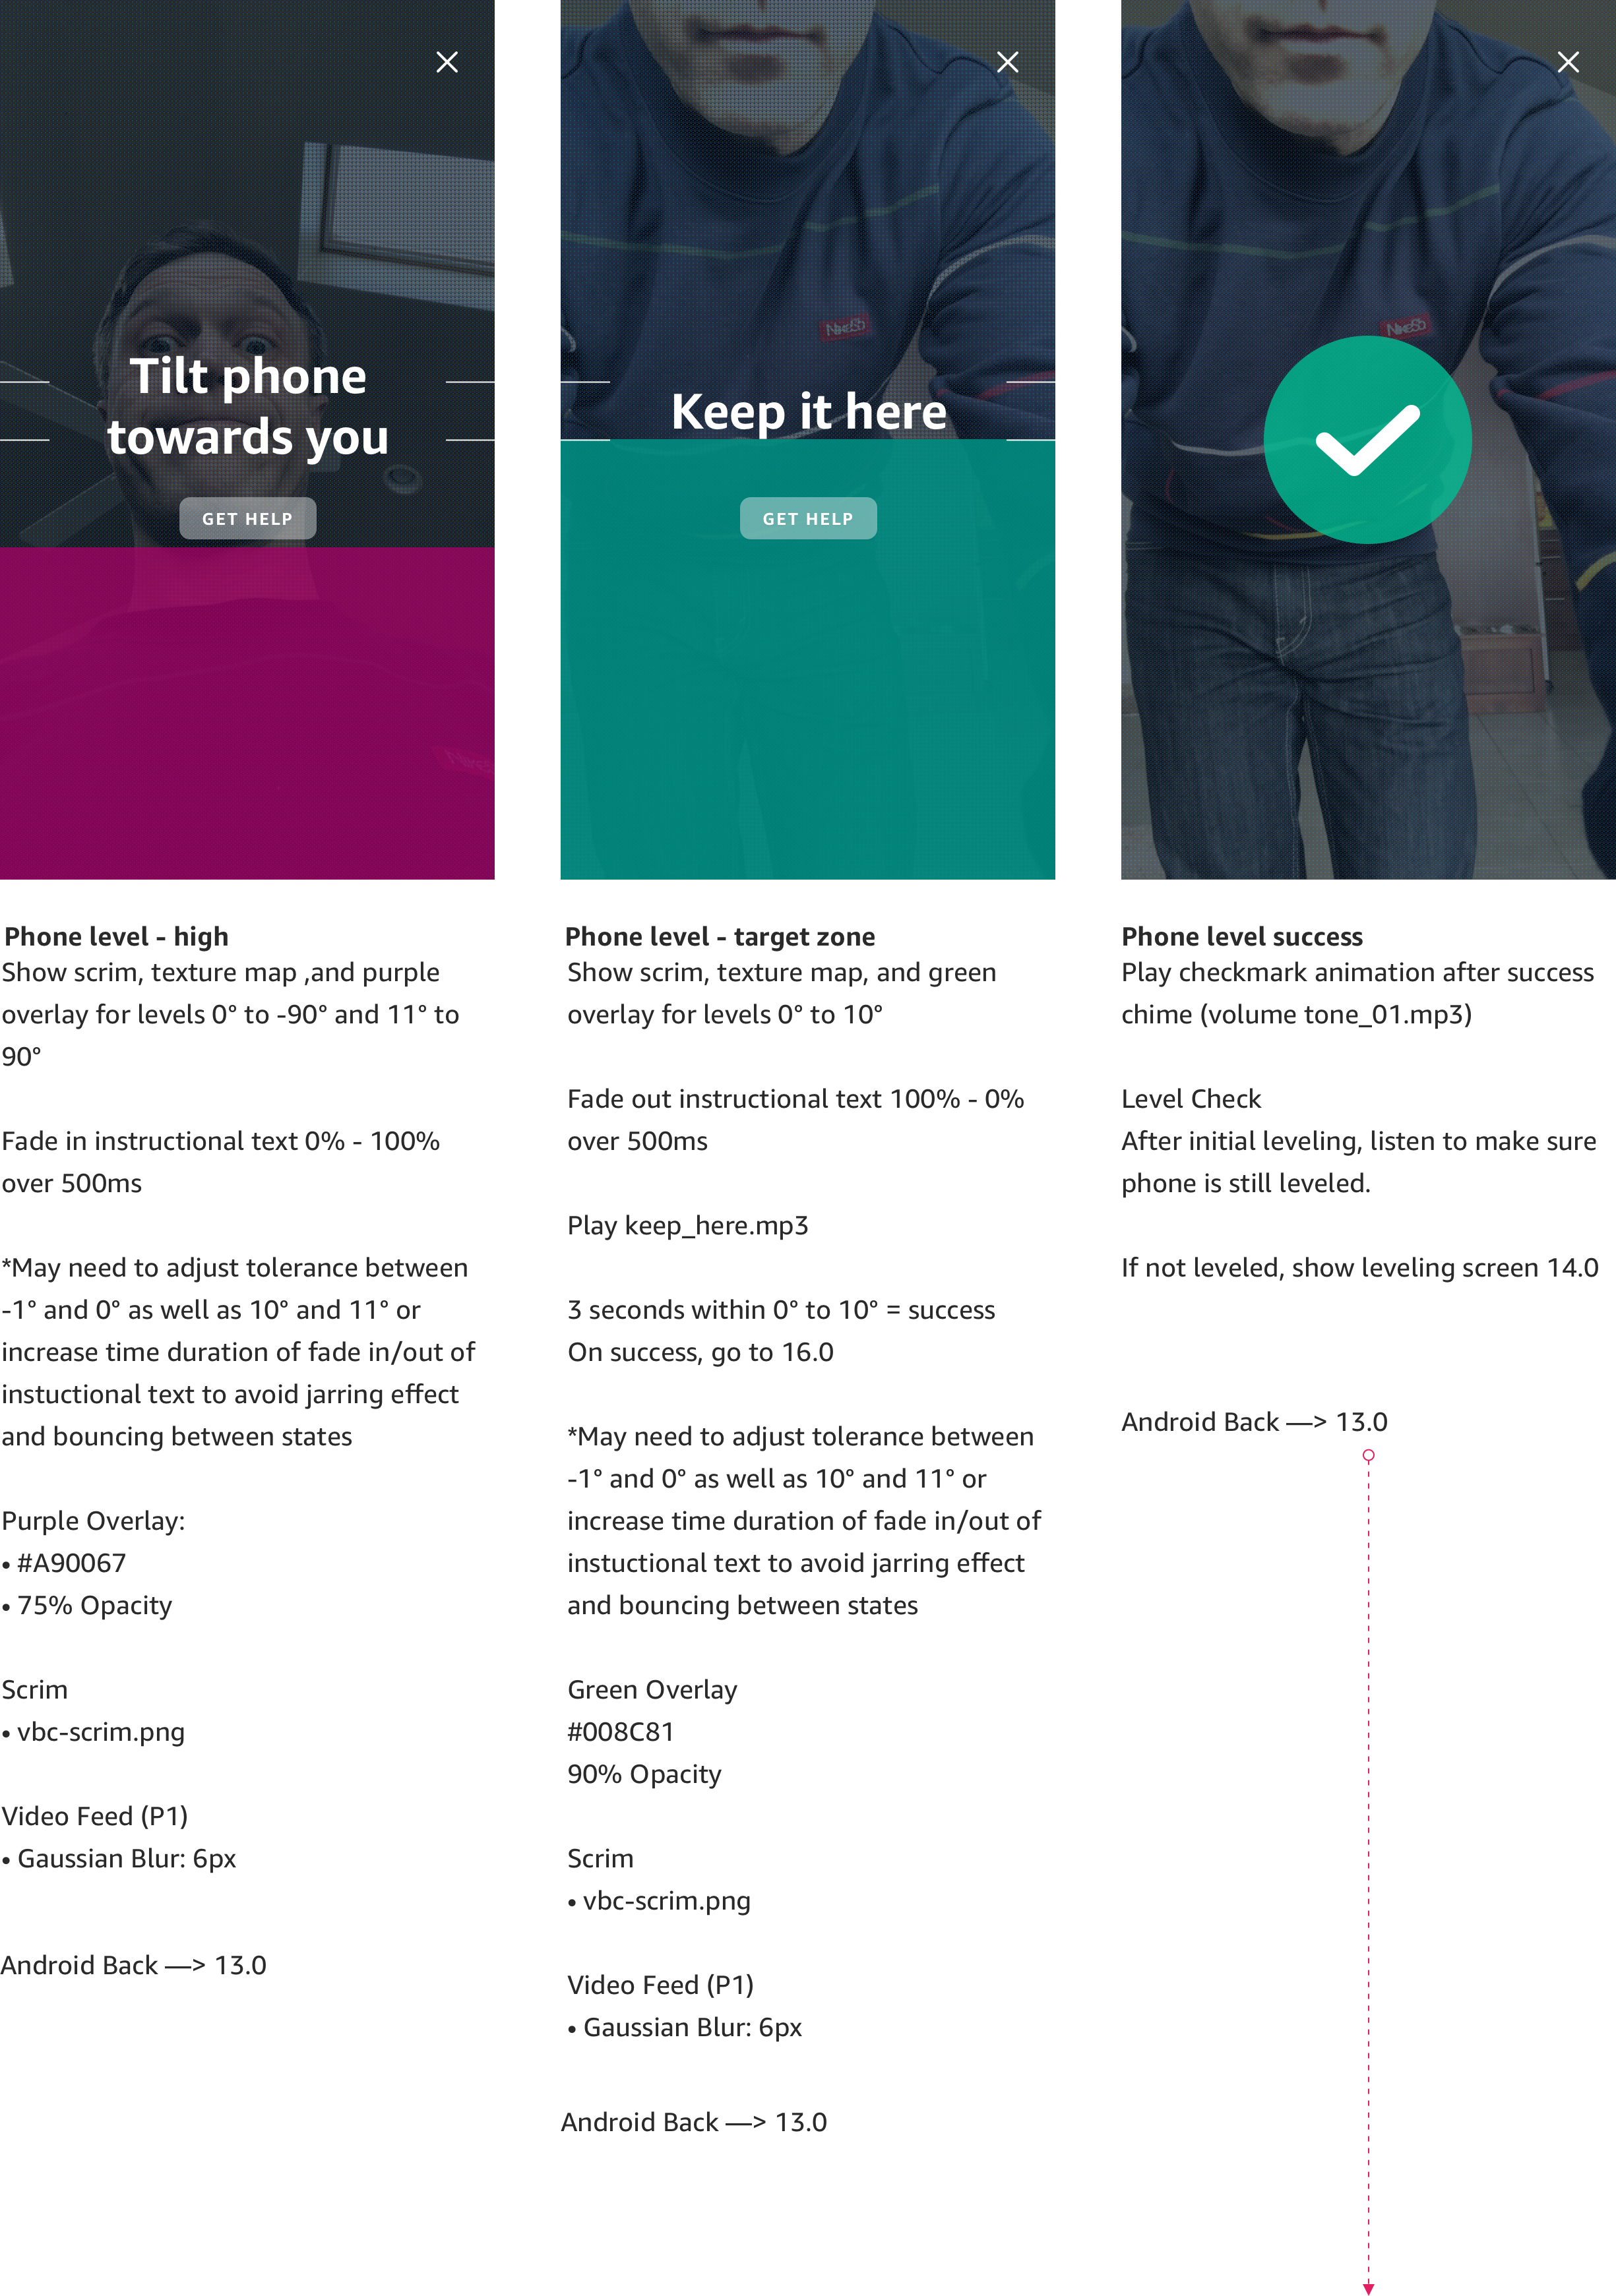
Once the customer finishes the tutorial they’re asked to place and level their phone. Leveling the phone keeps the phone’s camera at the appropriate angle for capturing a full body scan.
According to the timeout data, trials participants had challenges with the earlier versions of the level experience. I worked with the body engineering team to understand the requirements and designed an experience that clearly illustrated what to do and provided feedback when adjustments were needed. I chose a full-width fill for the level to make it easily apparent where the phone is in relation to the target level range. On-screen text lets the customer know what to do in simple terms.
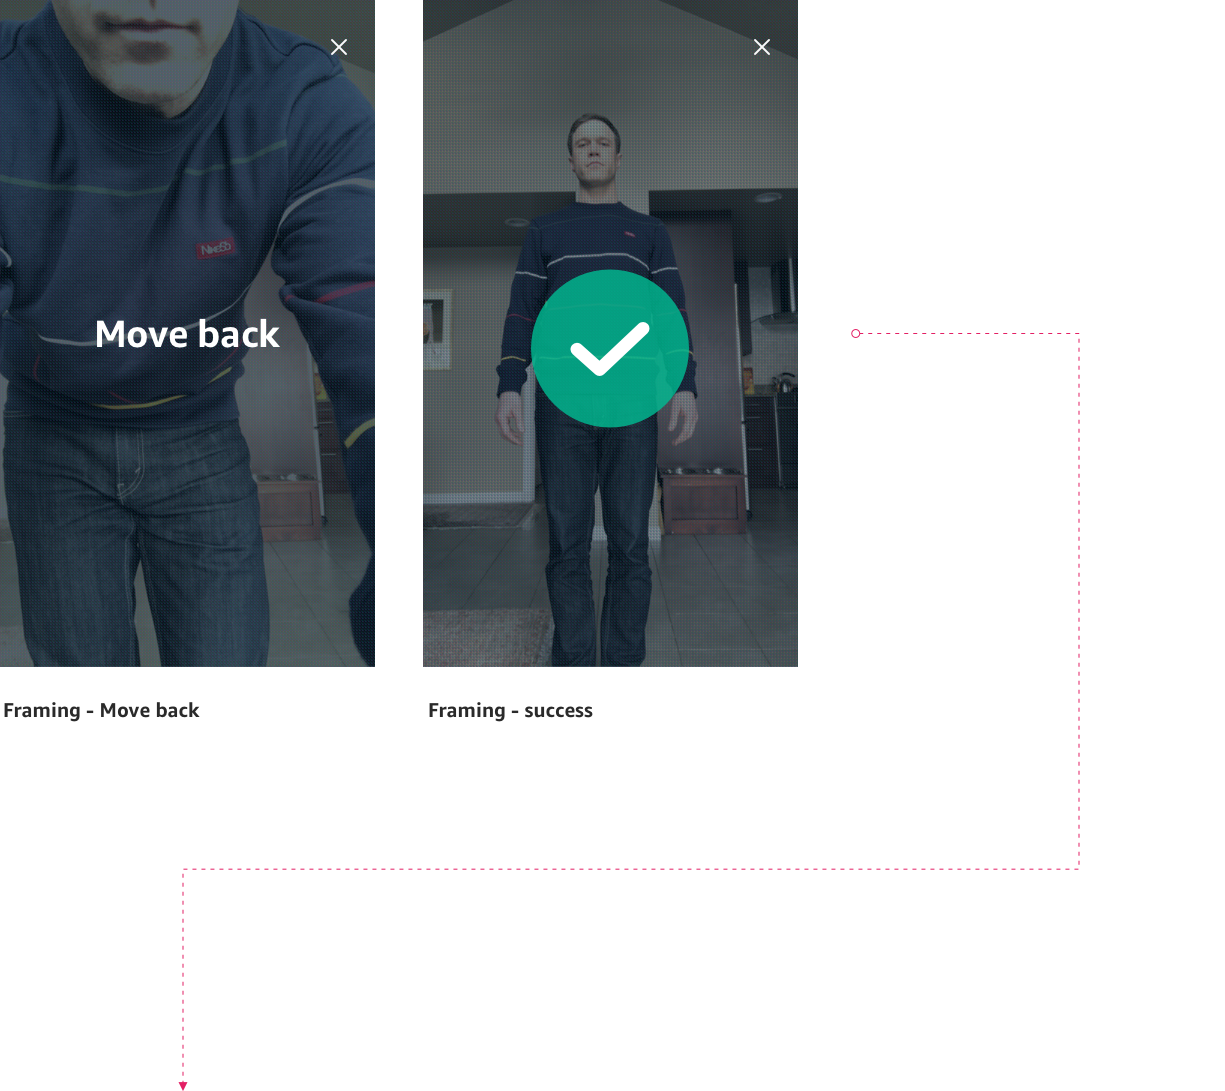
Once the device has been leveled, the customer is asked to move back to get within the appropriate range for the scan. Based on our measurements it’s around 6’ – 8’ depending on the camera angle. Once far enough back, a success animation lets them know they’re good.
Once the customer is in frame, we ask them to extend their arms and widen their legs. This allows the CV to clearly capture the customers waist-line, arms, and legs.
I worked through several different mental models for capturing the a-pose and learned that subtleties in the on-screen visual made a huge difference. I initially used an outline for the silhouette, which became known as the gingerbread man. But through trials feedback and scan reviews, we learned that participants were trying to fit themselves inside the outline vs. emulating the on-screen guidance. A simple adjustment of adding a semi-opaque fill immediately increased satisfaction and completion scores.
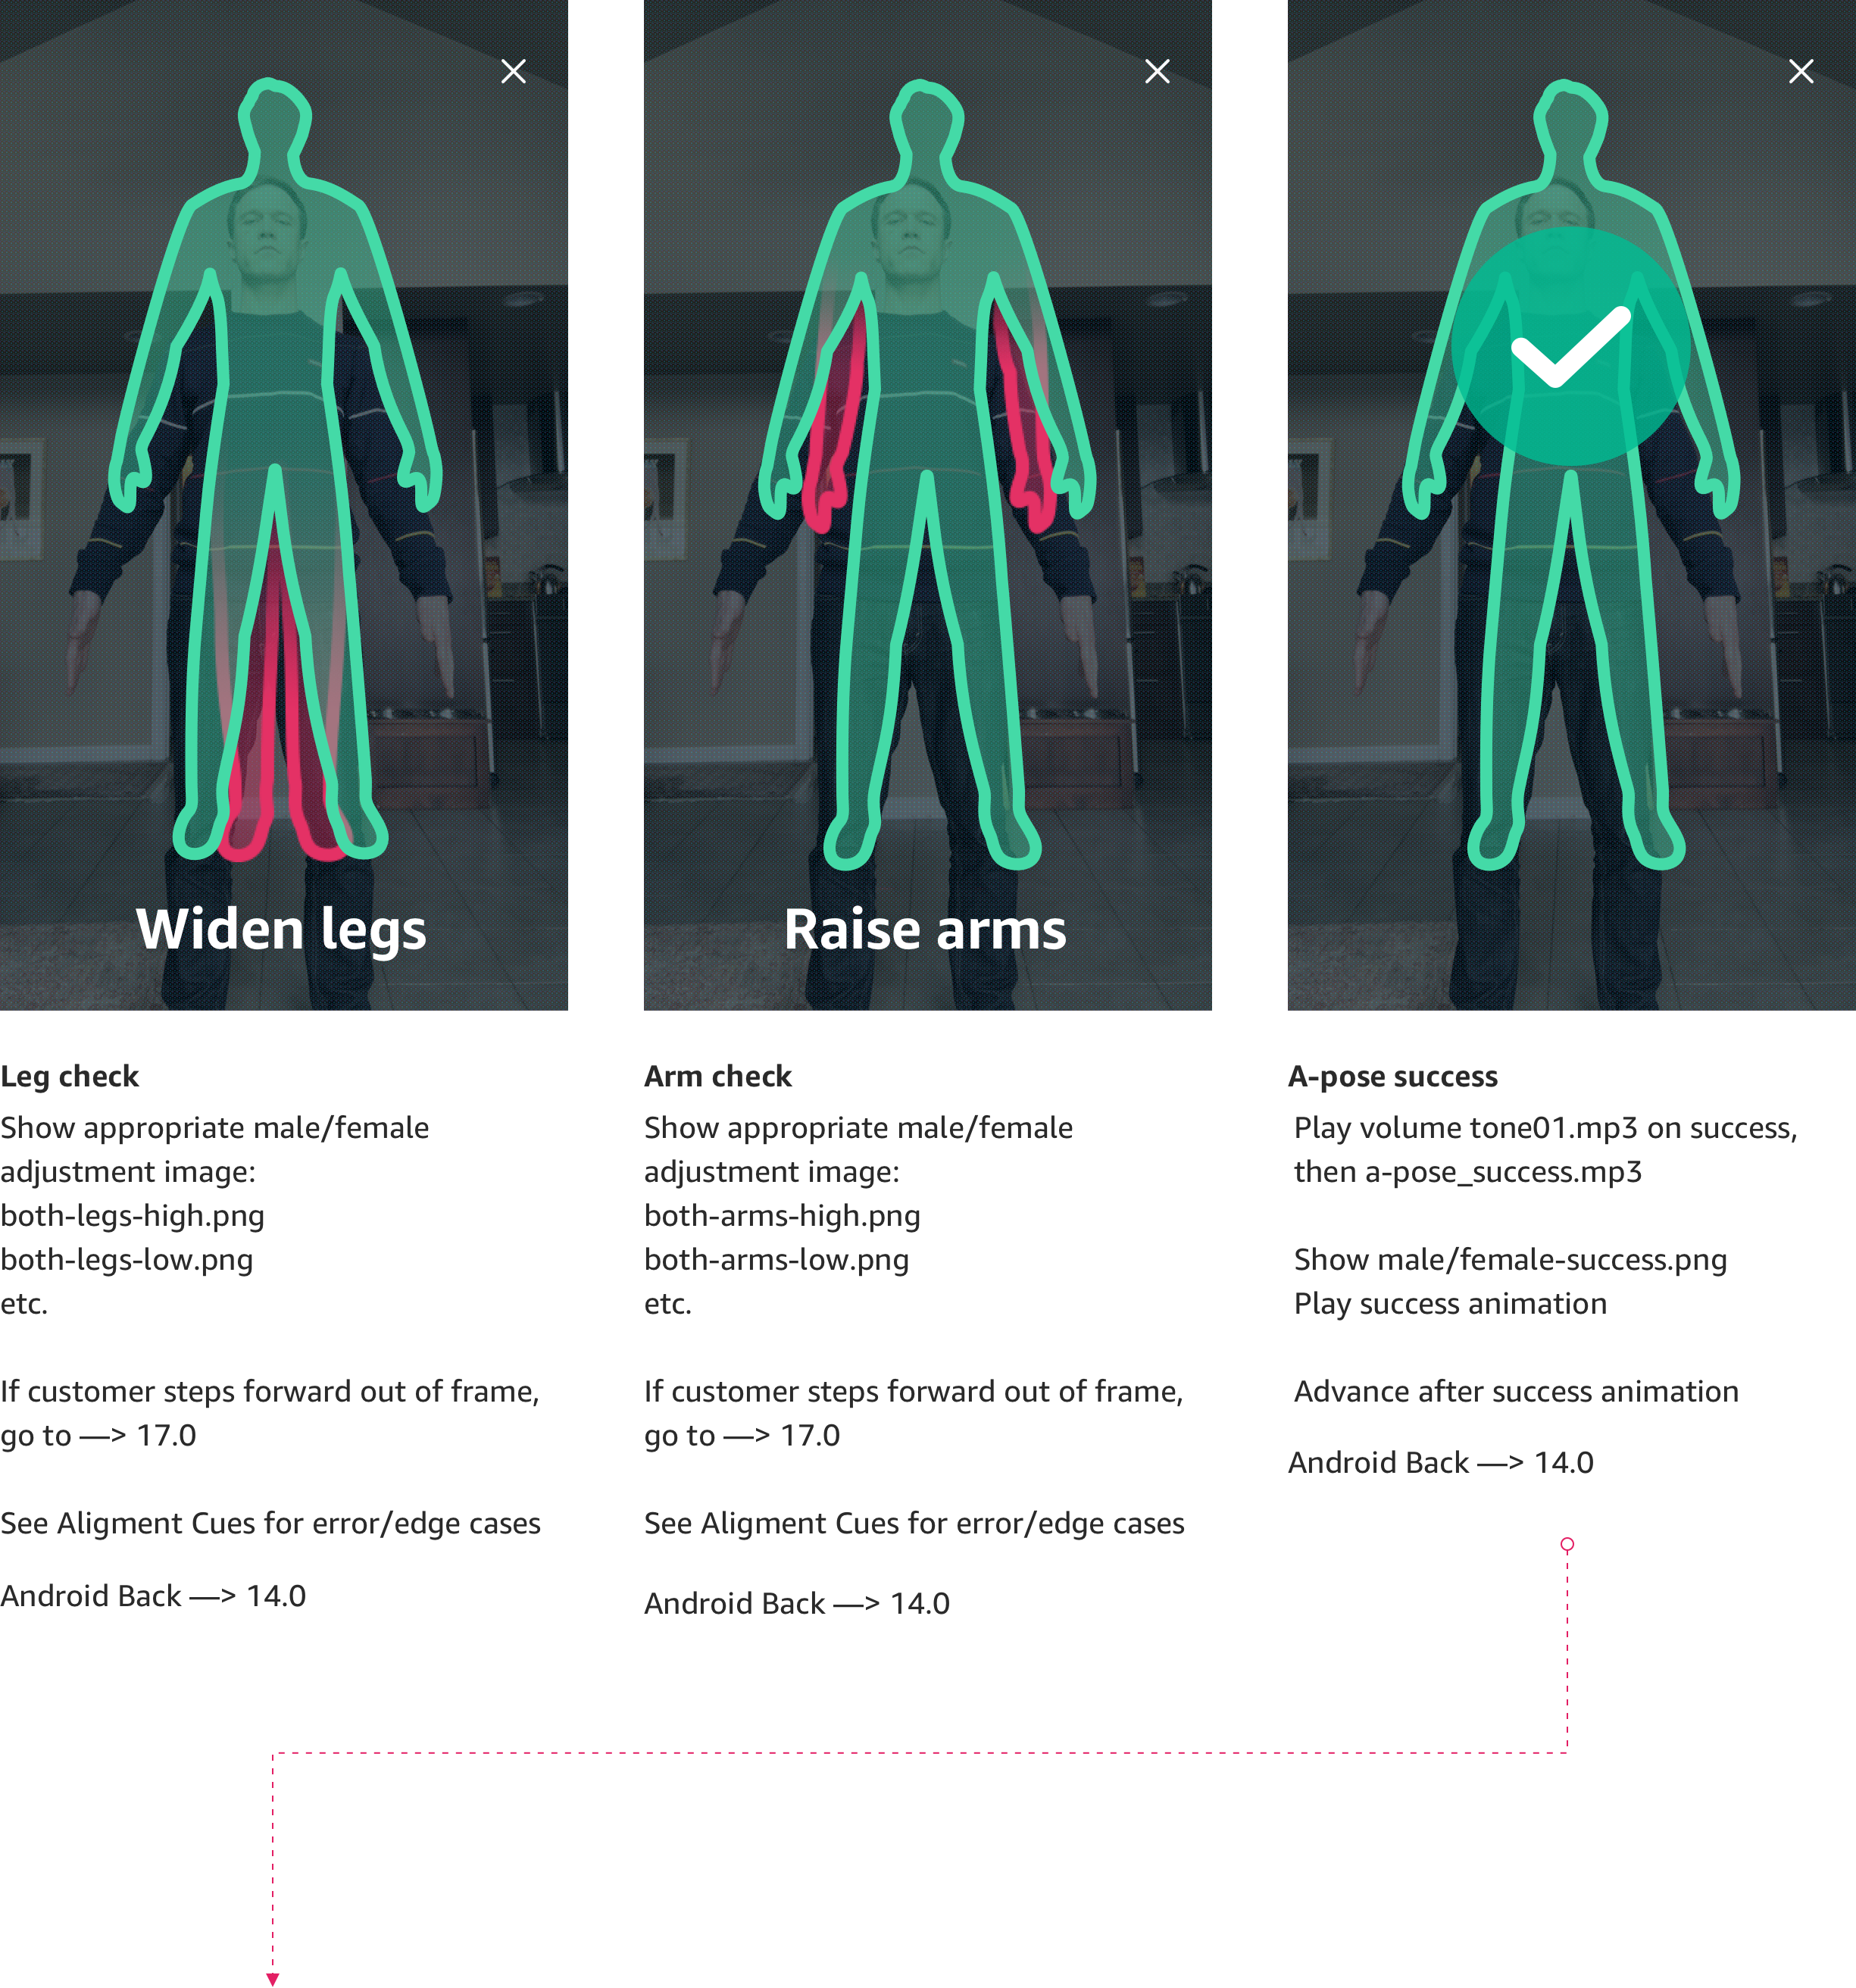
Once in A-pose, we immediately count down to take the front-facing scan. The countdown is there to cue the customer we’re beginning the scan. After the countdown, a chime sound plays in concert with a screen flash to let the customer know we’ve taken the photo. The flash is completely artificial, but cues the customer that something just took place. The chime sound is used throughout the scan and cues the customer to transition to the next pose.

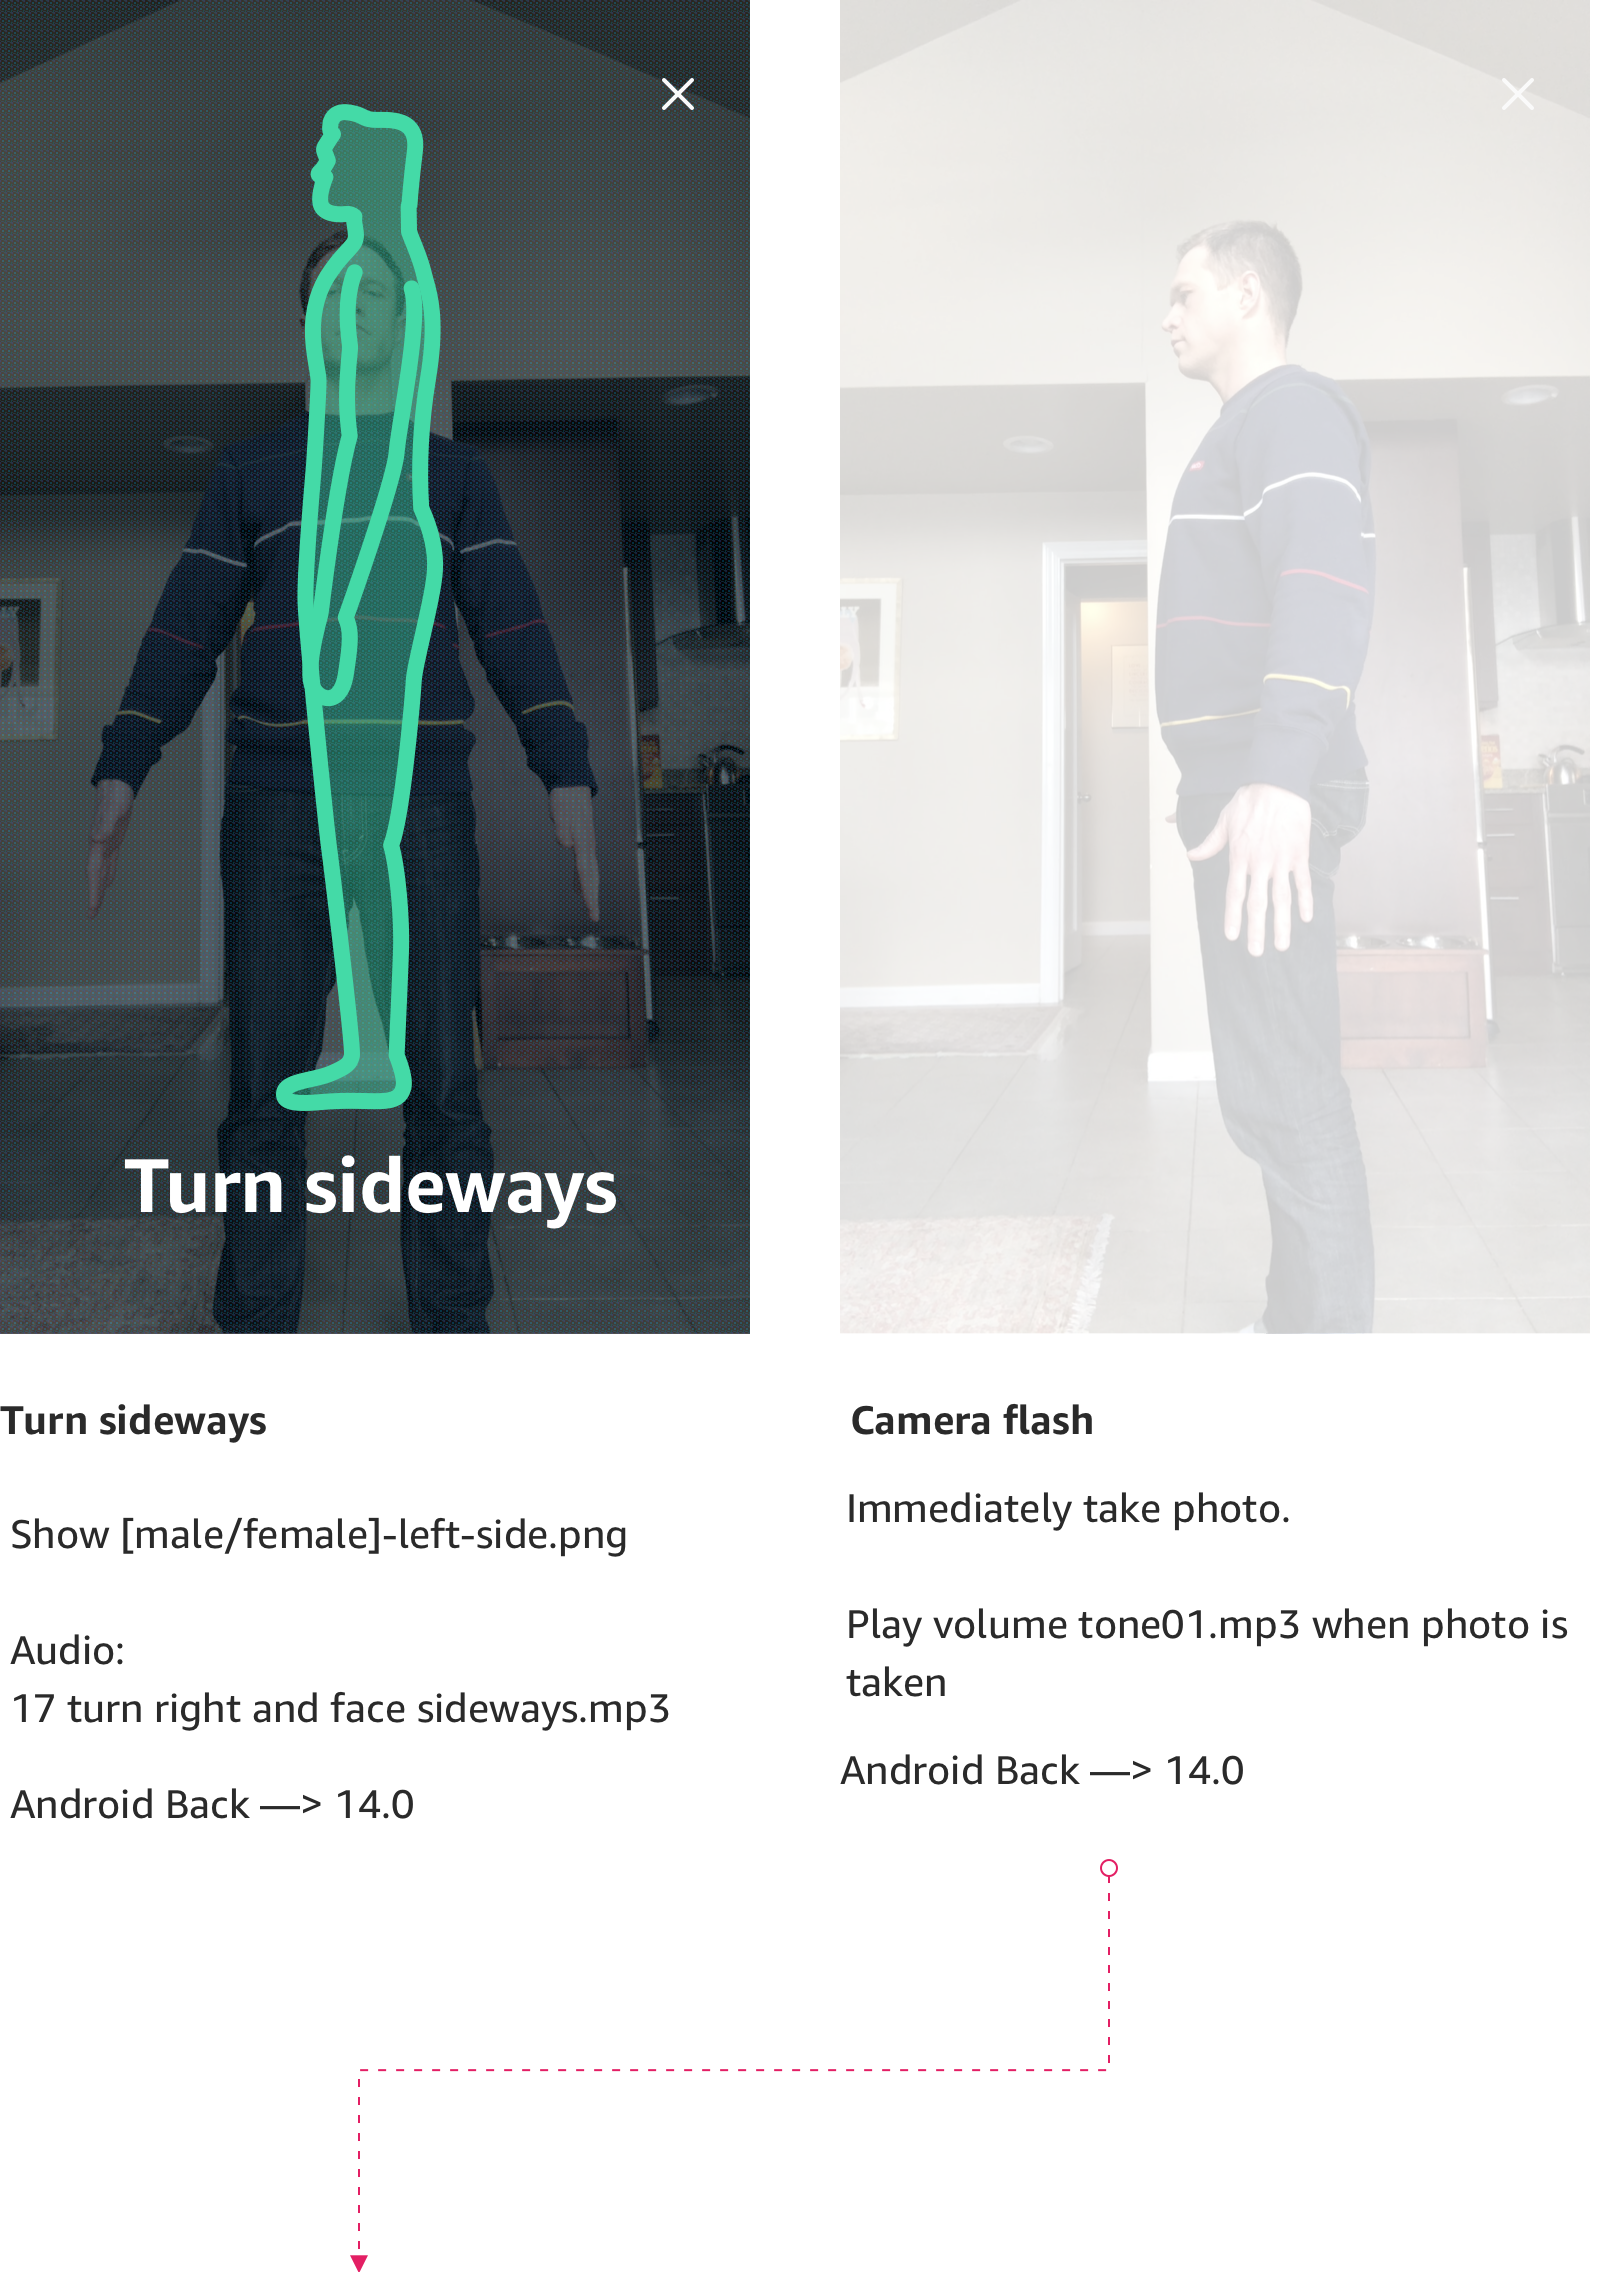
The pivot happens once the customer is asked to “turn right and face sideways”. The on-screen visual changes to show the profile of the silhouette with the accompanying text, “Turn sideways”.
This sequence of events was a big point of contention between product, engineering, and myself. It’s a confusing set of instructions that requires clear, but not overly specific guidance. In addition, once the customer turns sideways they no longer can see the screen for the majority of the scan.
Given that the customer turns away from the screen, I recommended we use all available modalities to guide them throughout the entire process. To aid in the on-screen guidance, I recommended we add voice over guidance to help throughout the experience, especially in the high failure areas. The pushback I received was regarding speed and that the voice over guidance would slow the customer down. I felt strongly otherwise, but was eventually vetoed. The one redeeming factor was when the scan experience went up to Jeff B and his feedback was that the pivot experience should have voice guidance : )

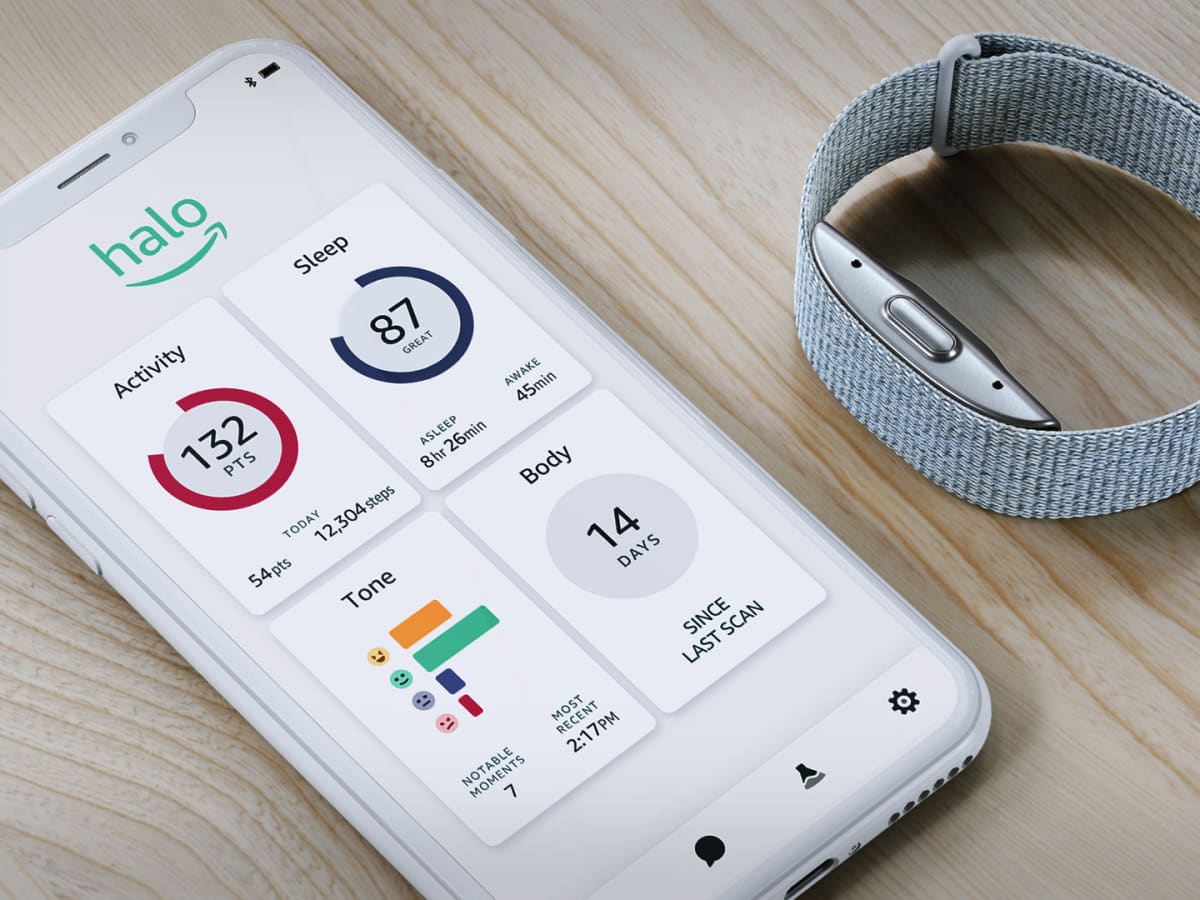
Once the customer successfully completes the pivot, they’re given a quick success message and then taken to the Body domain page to view the results. In the event there is latency, the customer sees an indeterminate loader for up to 30 seconds. Once the processing is complete, the customer can view their results along with their 3d avatar.

This was an end-to-end motion protype I did to show the full connected experience. This was a great tool that we referenced often when looking at pacing, voice over, transitions, and much more. Initially we were looking at using 3d to show the pivot and with some crude modeling we were able to see it didn't have much impact, especially with your head turned, which is where the majority of the 3d transitions took place.